I have fond memories of Birthdays as a child because my mom would always make the most creative cakes. I wish I had pictures of all of them to share with you, but some of her notable ones included a gumball machine and a bicycle. In addition to her Birthday cakes, she would often make a bunny cake for Easter.
When I asked her how she came up with the ideas, she couldn’t remember, but she thought she might have followed a pattern in a book. I think she just came up with them on her own. 🙂
With Easter quickly approaching, I wanted to share her bunny cake pattern with you and explain how to assemble the pieces. Hopefully you’ll be inspired to get creative and bake a bunny cake for your family’s Easter dinner this year!
The first part of the cake prep is no different from any other cake. Use your favorite white cake recipe or use a store-bought cake mix. Pour the batter into 2, lightly greased round 9″ cake pans. Bake the cakes according to the recipe or box instructions.
Remove from the oven and flip the cakes upside down onto a cooling rack. Let the cakes cool completely before continuing. You might even want to bake the cakes the night before and decorate the next day. Just make sure you cover the cakes overnight to prevent them from drying out.
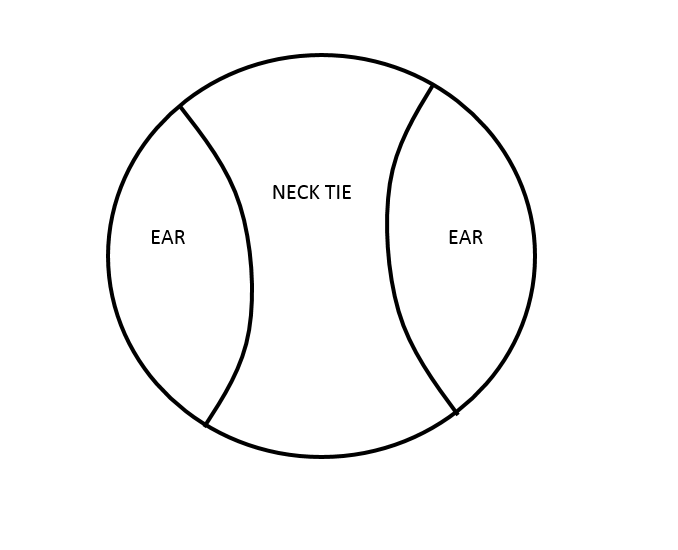
Once the cakes are cool, use a sharp, serrated knife to cut a small oval shape into each side of one of the round cakes. Do not cut the second round cake because it will be used for the bunny’s head. See the visual below for guidance. The curved lines represent where you need to cut. As you can see, each oval piece becomes one of the ears and the leftover piece becomes the neck tie.

Use a large cookie sheet to assemble the components of the bunny. Place the round cake in the middle of the pan; this piece is the bunny’s head. Place the oval-shaped ears on either side of the head and place the necktie below the head.
Prepare your favorite frosting recipe to begin the decorating process. I like to use white frosting, but feel free to get creative with your decorating skills and use food coloring to dye your frosting if you choose.
Carefully frost each piece of the cake once assembled on the cookie sheet, placing a little frosting between each piece to act as glue. Sprinkling shredded coconut on top of the frosting is a great way to make the cake resemble bunny fur. I don’t love the texture of coconut so I don’t use it, but it would look great!
Use a fine-tipped gel or frosting tube to draw the bunny’s nose, eyes, mouth and whiskers on the face. Add sprinkles, M&M’s, jelly beans or any other candies to make the bunny look festive.
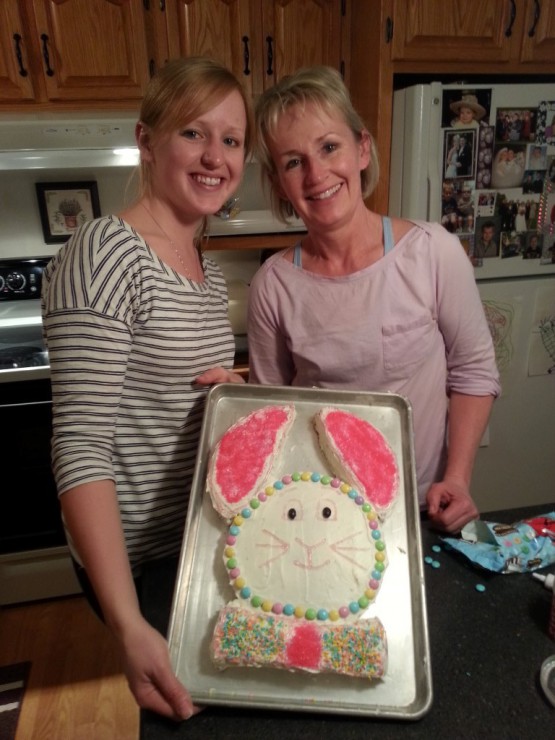
Here’s a picture of my mom and me with our last bunny cake we made together. Have fun making your bunny cake!

